A Purchase Invoice is a bill you receive from your supplier against which you need to make the payment. It is a confirmation given by supplier that the sale has occurred. Purchase invoice shows the contents of a specific transaction. It indicates the amount of goods as well as their prices. The purchases expenses can be recognized as soon as the purchase invoice is accounted.
Purchase invoice is created in response to the purchase order. It generally includes date of issue, invoice number, name & address of buyer as well as seller, PO number, quantity of goods purchased, price of each item purchased, discounts if any, taxes and total amount due.
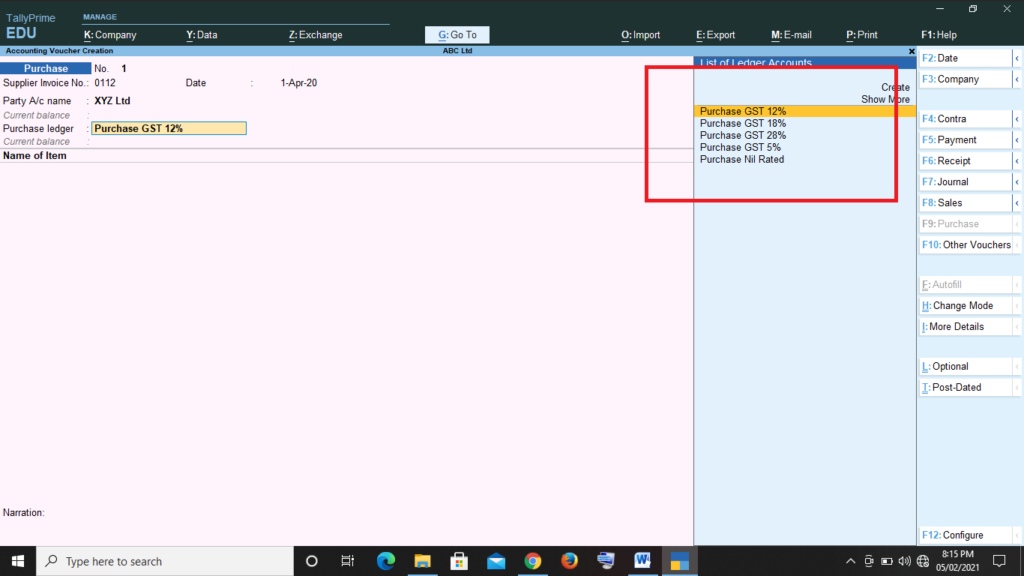
Before making purchase entry in tally, we must create following types of purchase ledgers:
1] Purchase A/c
2] Supplier A/c
3] CGST
4] SGST
5] IGST
Now to be more specific you can create different ledgers for CGST, SGST and IGST as per GST rates like CGST @9%, SGST @9% and IGST @18% etc.

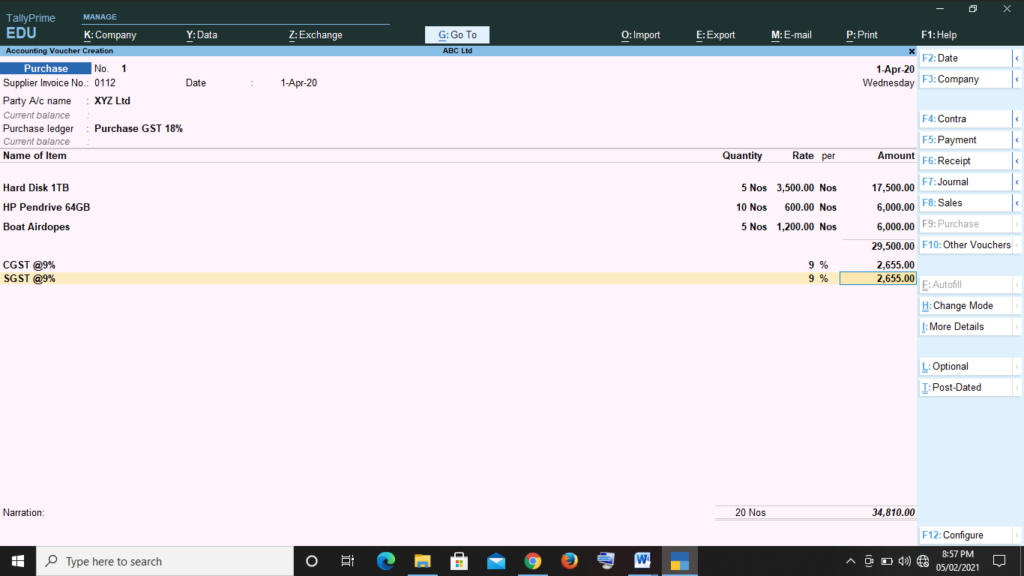
4] Select the required items, and specify quantities and rates.
5] In case of local purchase, select the central and state tax ledger (CGST & SGST) and if it is interstate purchase, select the integrated tax ledger (IGST).

6] Add the narration for your reference and press enter to accept the entry.
FAQs
1] How to enter purchase invoice number manually in Tally Prime?
– Step 1 Gateway of Tally > Press A (Alter) > Voucher Types
Step 2 Select Purchase voucher type
Step 3 In method of numbering option select manual.
Step 4 Press Enter and save voucher type.
2] How to pass purchase return entry in Tally Prime?
– You can record purchase return against an earlier purchase transaction using a debit note.
Step 1 Gateway of Tally > Vouchers > F10 Other Vouchers > Debit Note
Step 2 Enter supplier name in party a/c name column. Press Enter
Step 3 Dispatch details and original invoice details screen will open after entering supplier details. Fill the correct information. Enter party details.
Step 4 Select the relevant purchase a/c for ledger account column.
Step 5 Enter items you want to return, their quantities and rates. Enter GST details. Press enter to accept the debit note.
